
The idea of travelling to Scotland had long been in the back of my mind. Being the land of my heritage I had a desire to go but it wasn’t until my wife loving suggested going as an anniversary trip that the idea came to fruition.
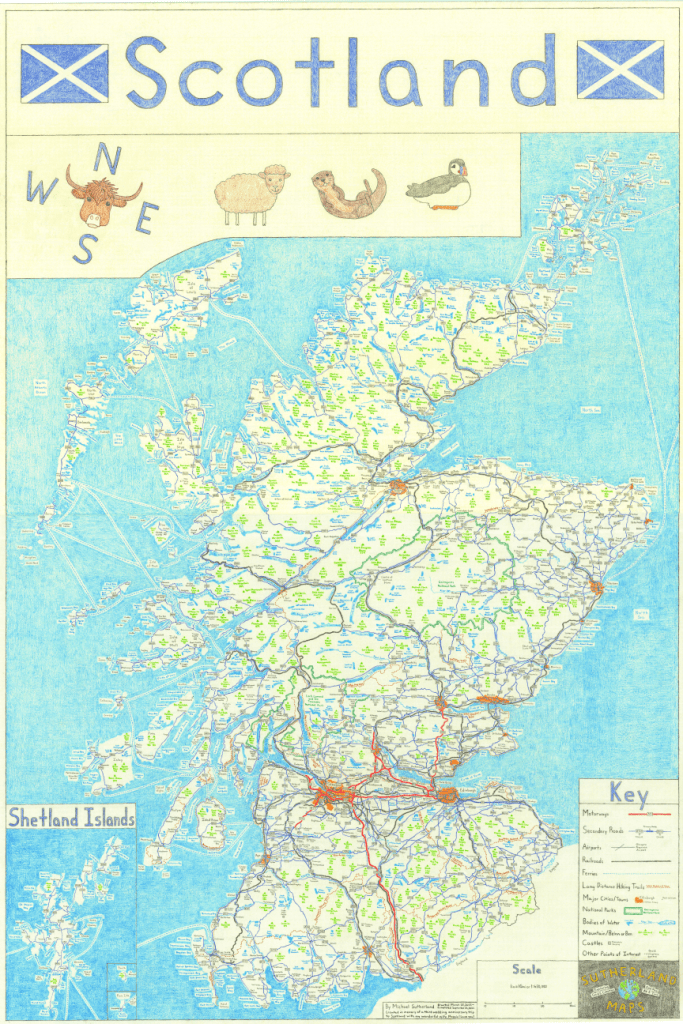
Anyone who knows me well knows that when I live in/travel to a new place I want to make a map of it. So once the trip was finalized I began work on making a map of Scotland just over a month from the trip on March 25, 2025 (which also happens to be my birthday). I didn’t get to far on the outline before leaving but I started thinking through the layout and symbols, etc.

After defining the symbols and colors I moved my attention to the layout. On more recent project’s I’ve been visualizing this in GIS software (Either ArcPro or QGIS will do). Below is a screenshot of the header layout which gives a decent idea of the process. Using the map layouts gridlines, I pinpointed where different parts of each letter will go. The same is then true for the rest of my map, using an underlying reference basemap.
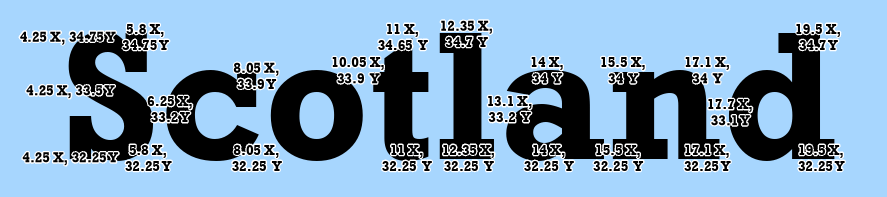
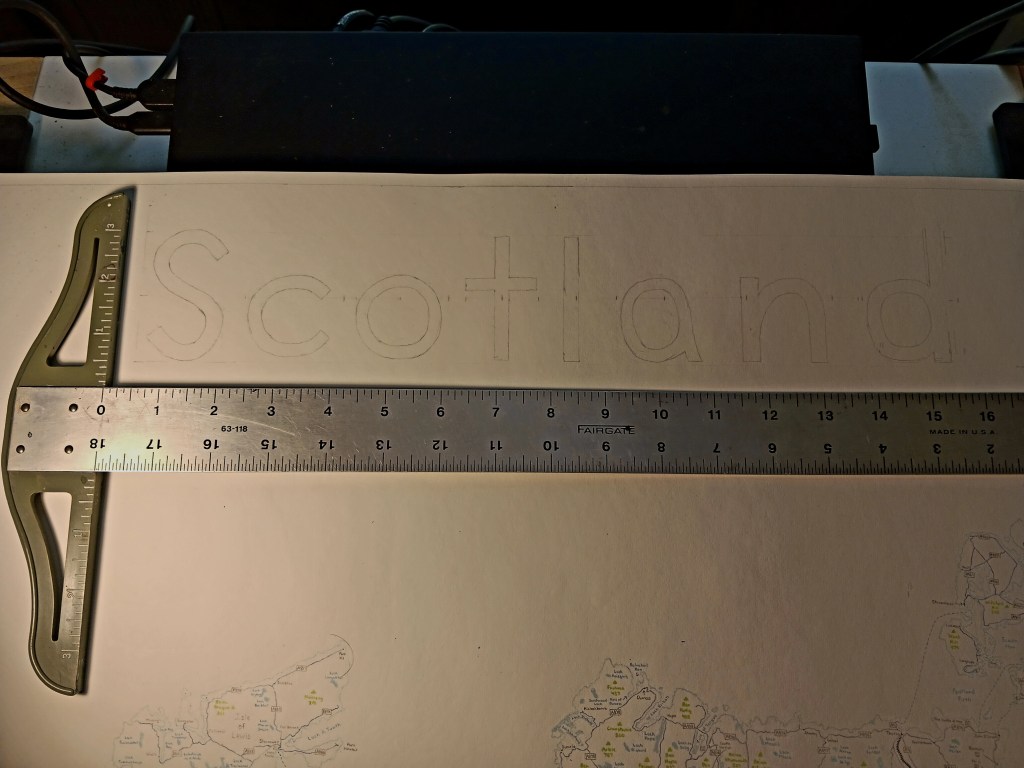
This then gives us the above. Text that is centered and spaced correctly in proportion to the rest of the map. I then repeating this process hundreds of times to begin building the map seen below.
One question I’ve gotten is why angle the map slightly? When visualizing Scotland in the 24 by 36 in layout I found that the slight tilt helped me to maximize feature size with the British National Grid (or Ordnance Survey National Grid).

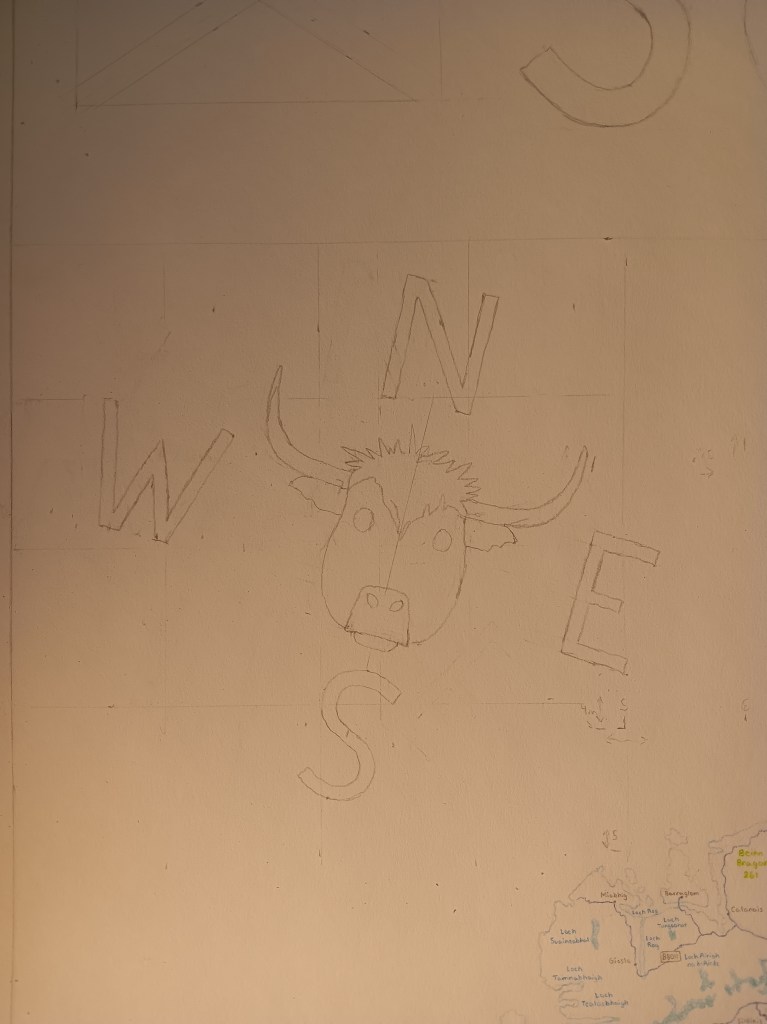
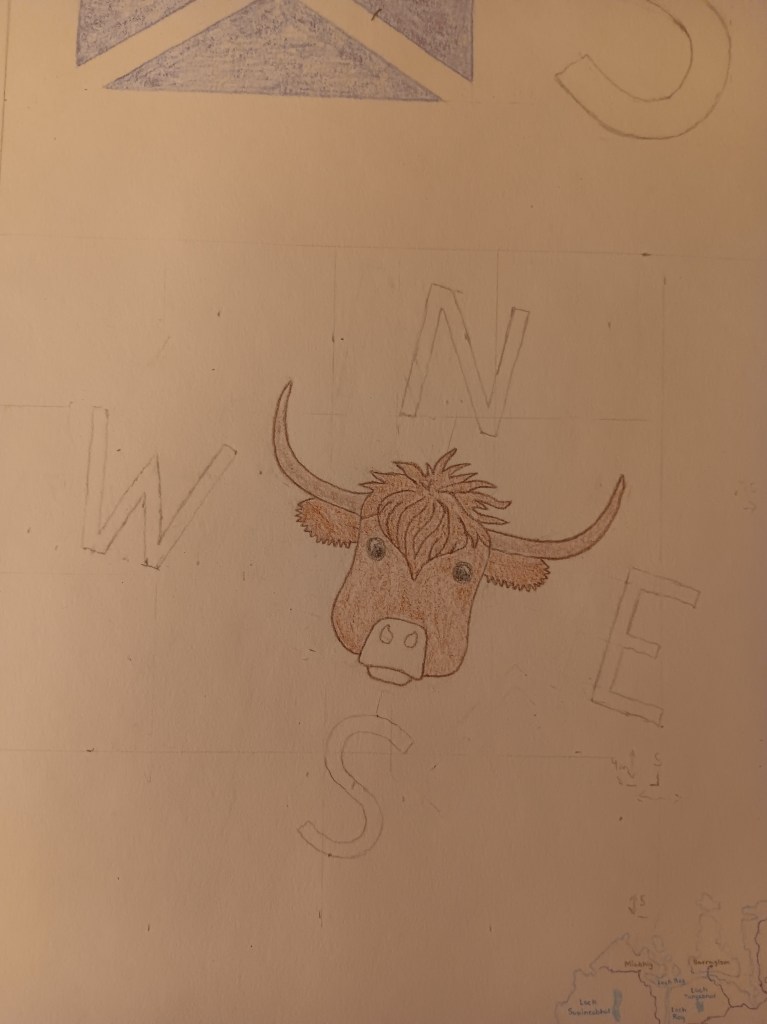
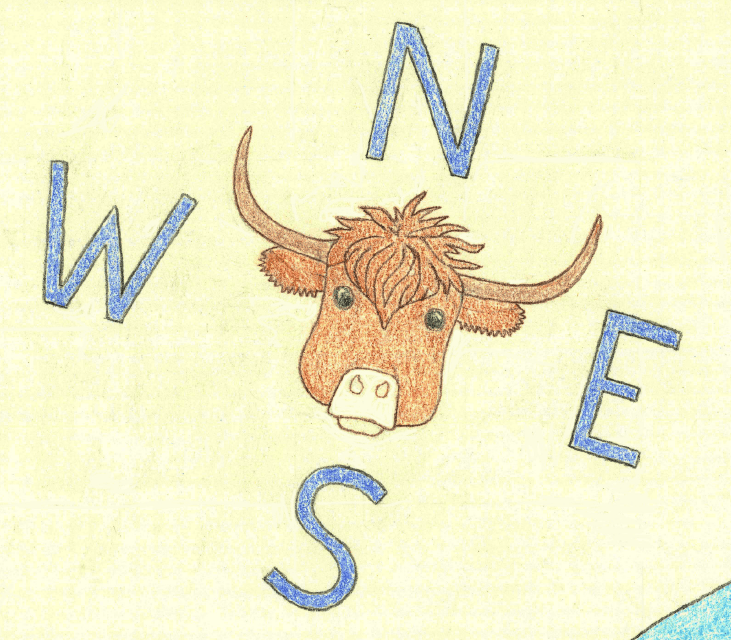
When drawing in features such as the highland cow compass rose I created a grid lightly in pencil to guide me.
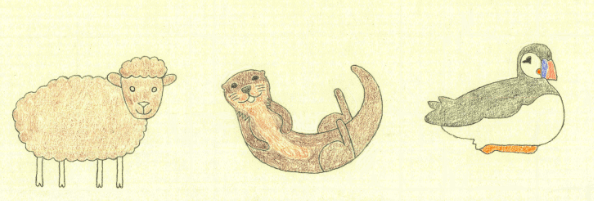
Slowly but surely the progress continued not only with the compass rose, but other prominent animals in Scotland.
Sheep, Otters, and Puffins were the three I decided to include. Faint grids sketched in pencil once again helped me created these beautiful creatures

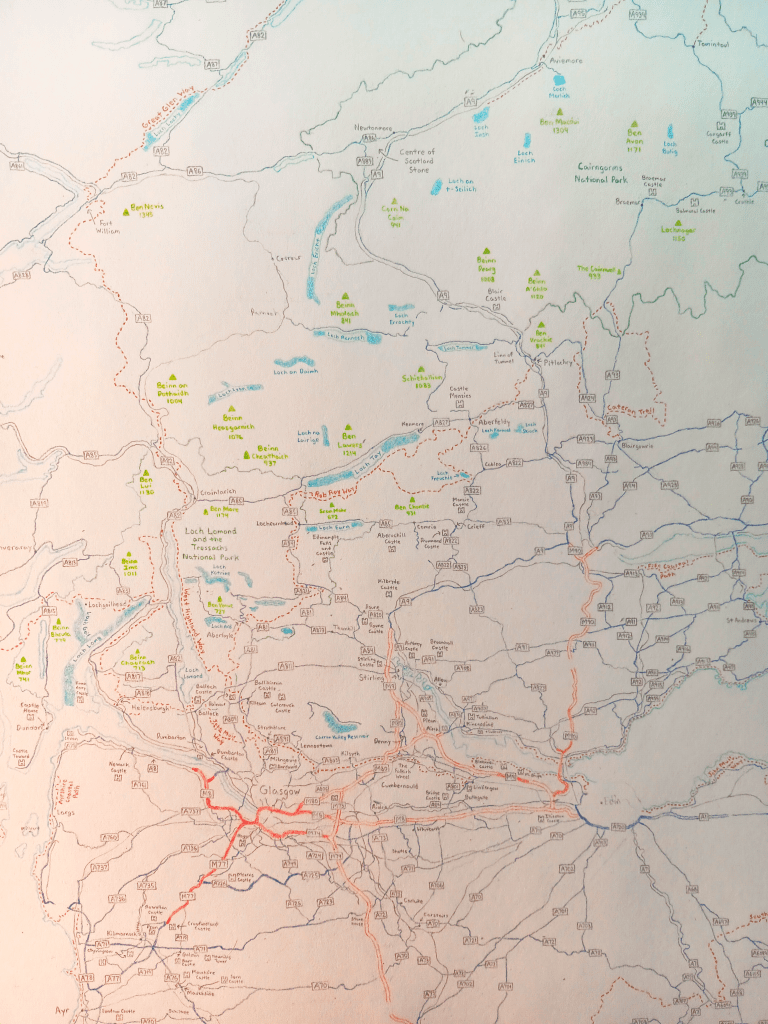
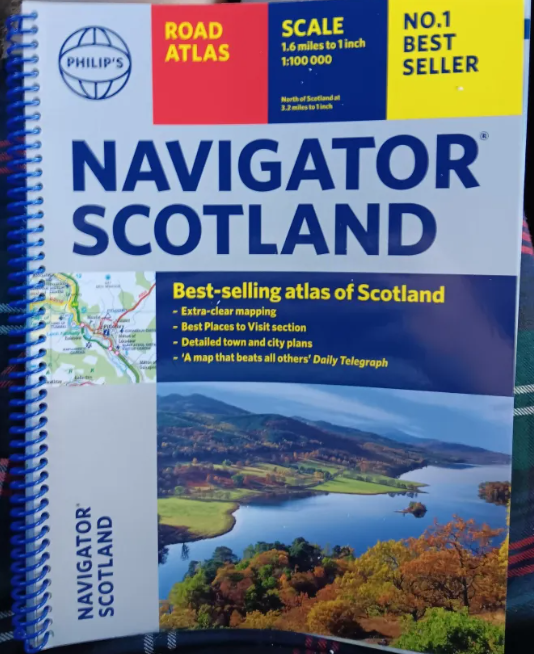
How did I choose what features to include? What places, trails, attractions, etc.? This is one of my favorite parts of the process. I got to dive into the data and select what I believed best captured the spirit of the map. I parsed through two different Atlases of Scotland, scoured tourist websites, pulled data into GIS software, and panned Google Maps for quite a while. What I decided to focus on was creating a general reference map that had my own personal touch with fun quirks (what those are you’ll have to see for yourself :)).
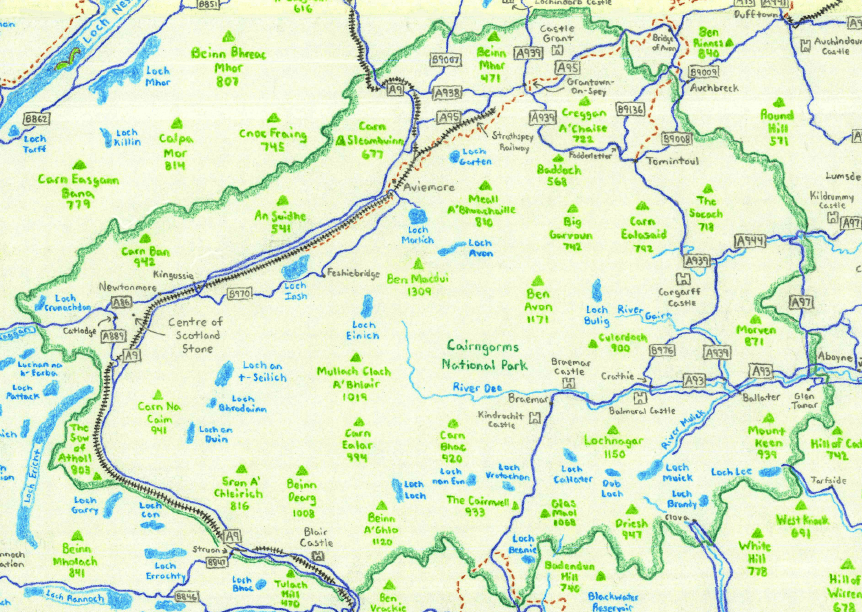
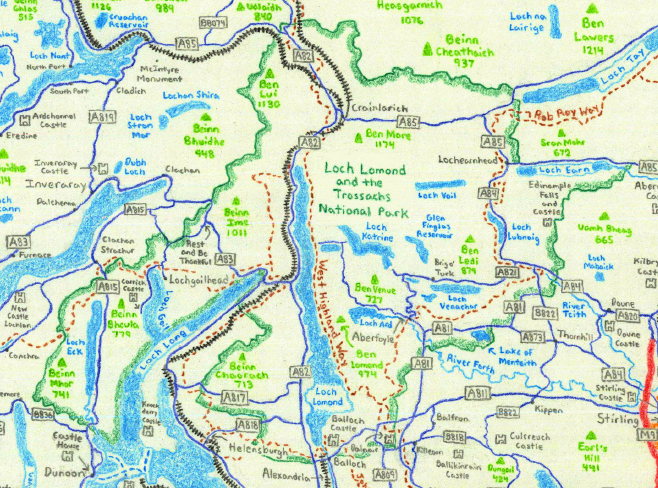
Why feature certain mountains, bodies of water, towns, features, etc.? More often than not I chose the largest mountain/lochs/etc. because they tended to stand out more. But other times I chose what named features had shorter names that fit the open space better. It really was a mixed bag
My goal was to create a map that you could hang on your wall as art or use for general navigation if needed. Your motorways along with Class A/B roads are included. While this may not get you all the way to your destination it’ll at least keep you off your GPS somewhat.
One of the fun additions to the map was a nod to the Loch Ness monster.

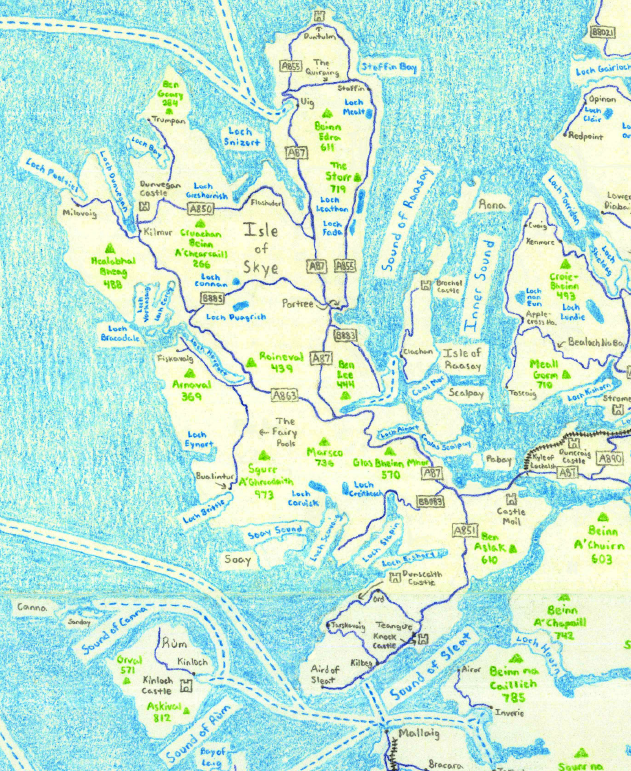
Isle of Skye was one of the many places my wife and I visited. It’s a good example of highlighting the many ferry routes that reach its shores, connecting residents and visitors to other islands.
After 140 hours of work over six months I was thrilled to finish the map you see below. The only digital edits I made were some slight color correction and ramping up the colors in Photoshop. I’ve loved every map I’ve made but I believe that as I continue to work on my artistic skills that God’s given me, that each map gets better and better.
This map will always remind me of that wonderful anniversary trip that God blessed us with.
And now I get to share it with others which I am incredibly grateful for.


If you’re interested in acquiring a copy of the map you can find it on Etsy! Also, feel free to share feedback at michael@sutherlandmaps.com


